Getting started
Overview
To get you started, you first need to install the extension in Visual Studio Code.
Installation
You can get the extension via:
- The VS Code marketplace: VS Code Marketplace - Front Matter.
- The extension CLI:
ext install eliostruyf.vscode-front-matter - Or by clicking on the following link: open extension in VS Code
Beta version
If you have the courage to test out the beta features, we made available a beta version as well. You can install this via:
- The VS Code marketplace: VS Code Marketplace - Front Matter BETA.
- The extension CLI:
ext install eliostruyf.vscode-front-matter-beta - Or by clicking on the following link: open extension in VS Code
Info: The BETA docs can be found on beta.frontmatter.codes.
Important: As there can only be one version running of the extension, you will need to either disable or uninstall the main version before installing the beta version. Disable both extensions globally and select "Enable (Workspace)" will enable the extension only in the currently loaded workspace. This way you can test the BETA version on some of your projects/workspaces and keep the main version installed and activated in other projects.
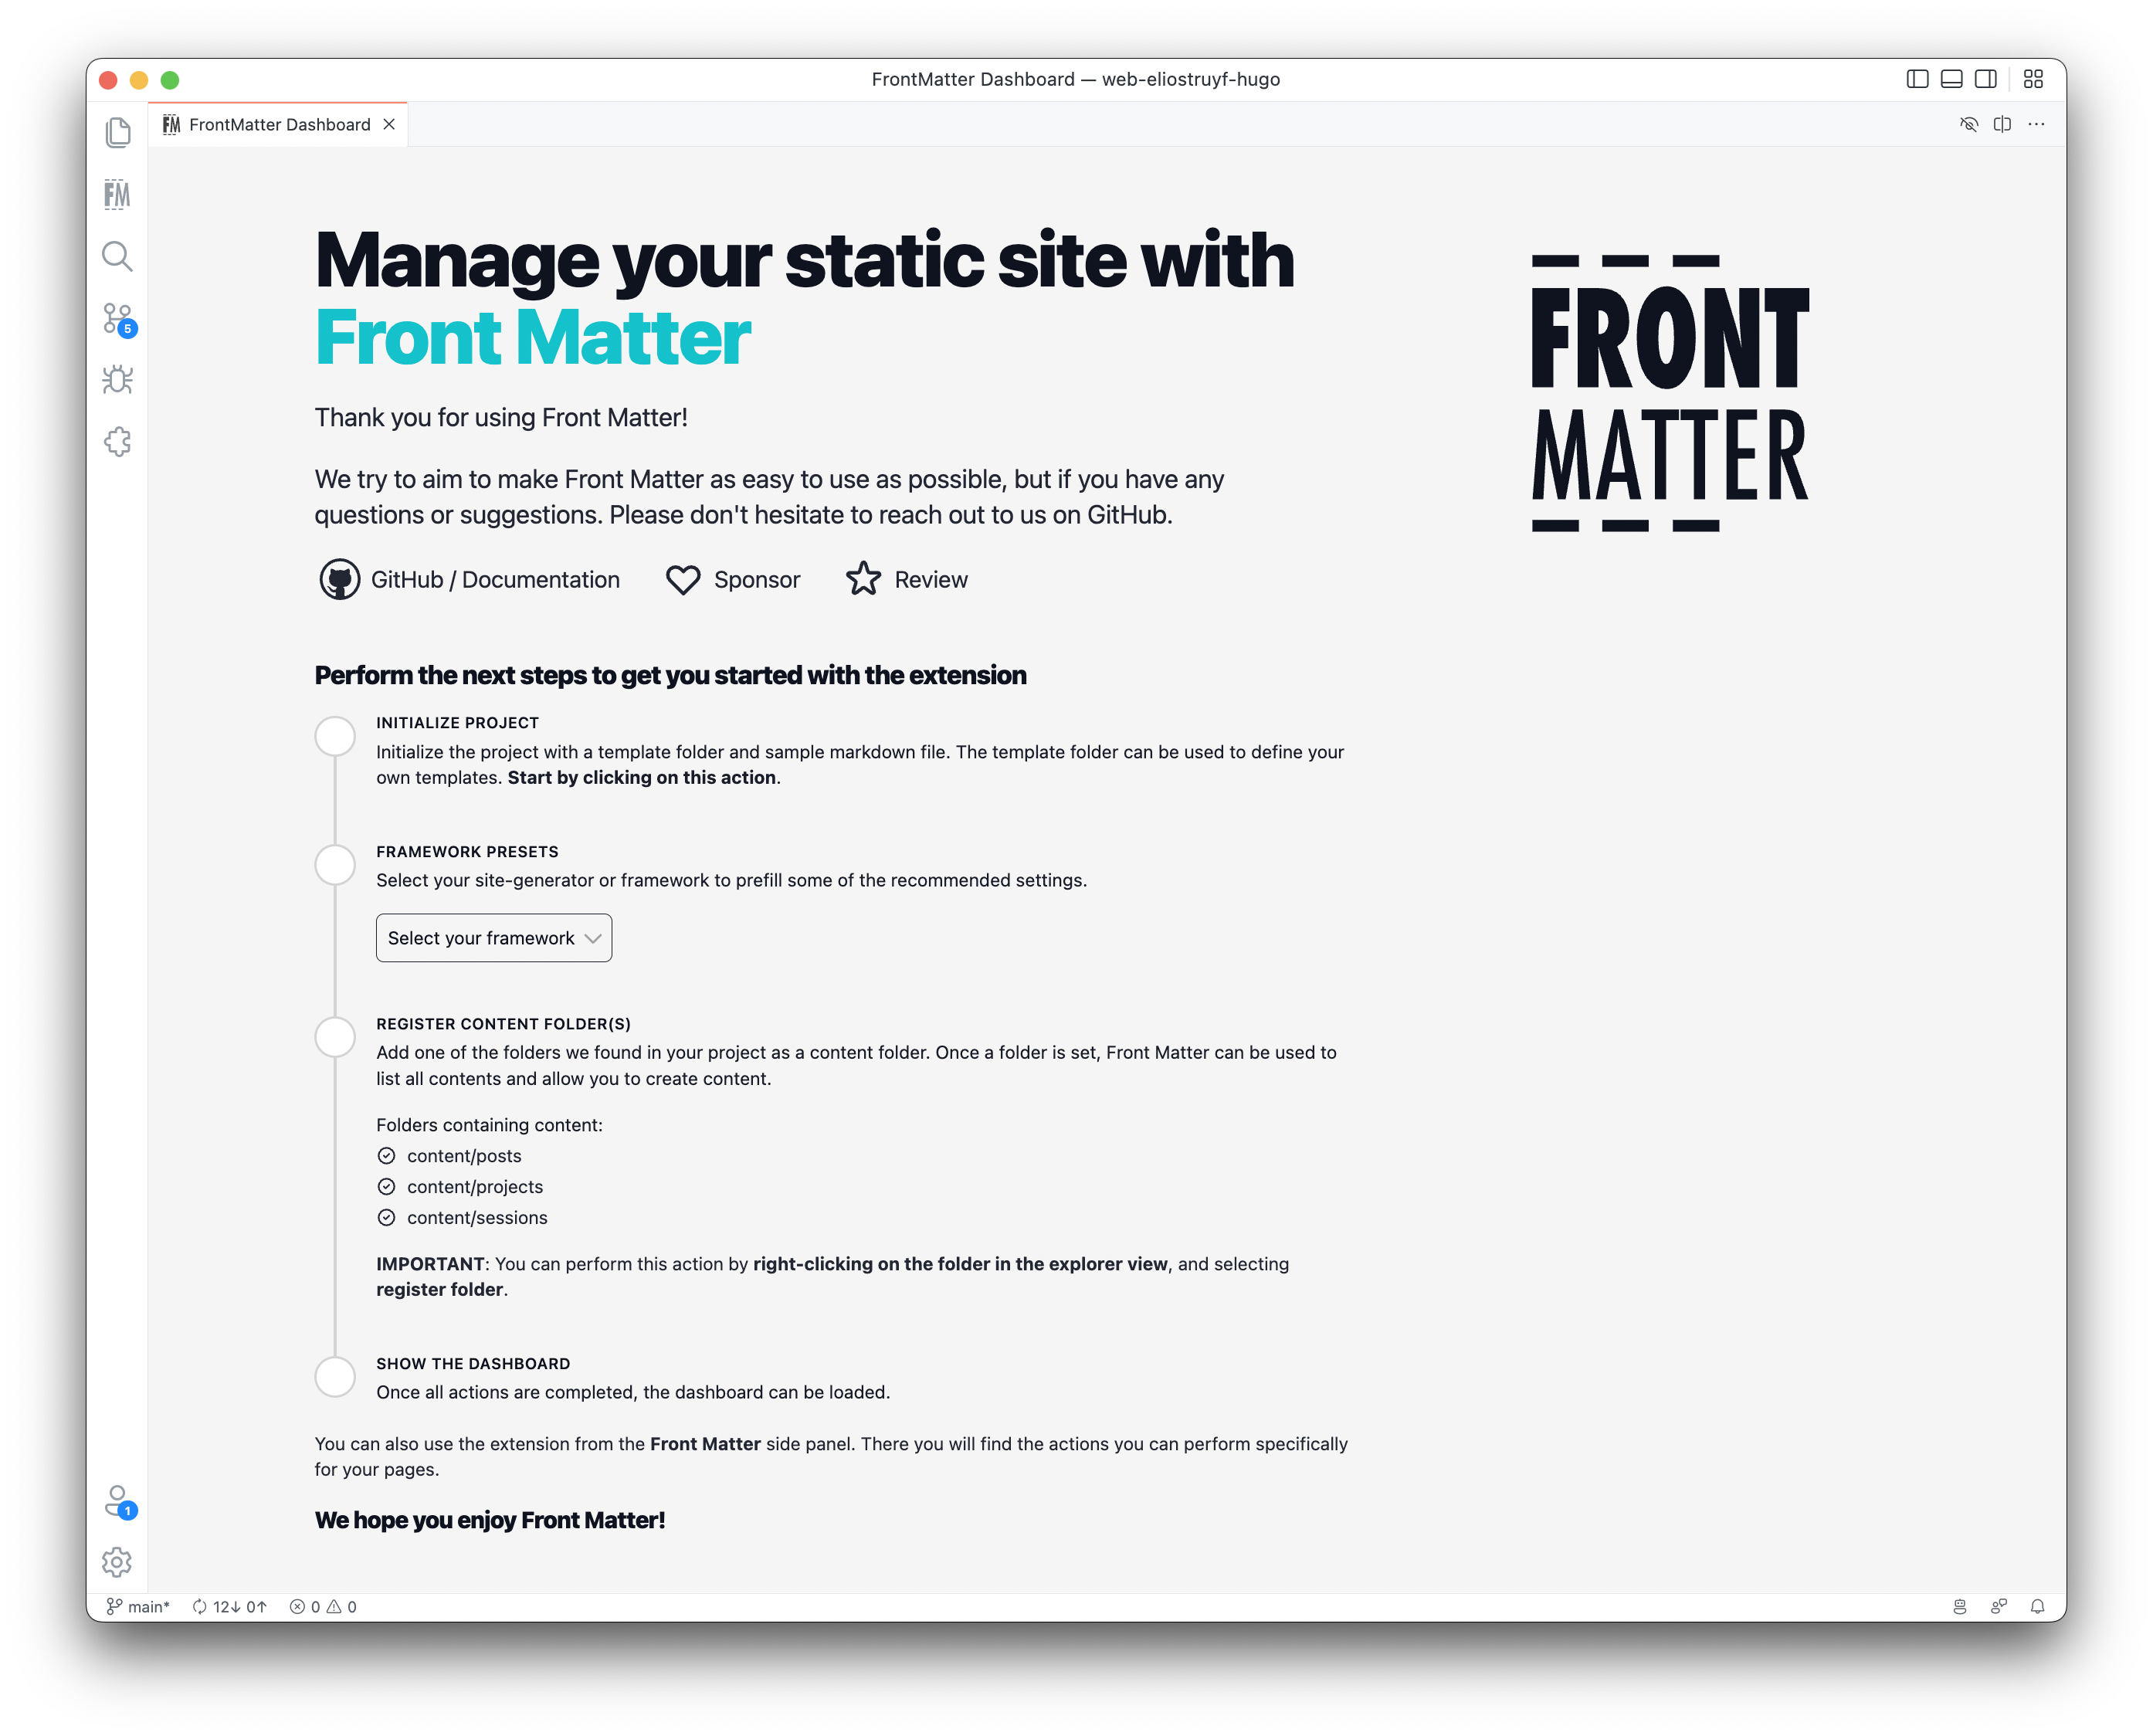
Welcome screen
Once installed, Front Matter will open the welcome screen the first time Visual Studio Code gets reloaded.
Important: Front Matter supports light and dark mode. It will be automatically detected based on the theme you are using.
Info: The welcome screen will also be shown when Front Matter is not yet fully configured.
Required configuration
On the welcome screen, there are two tasks to complete before you can take full advantage of Front Matter.
Step 1: Initialize the project
In this step, you will need to initialize the project. This will create a
frontmatter.json file and a .frontmatter folder in the root of your
project in which the media database and templates will be stored.
Step 2: Configure the site-generator or framework you use
In this step, you will need to configure the site-generator or framework you use. If your static-site generator is known by Front Matter, it will automatically set some configuration options.
If your static-site generator or framework is not in the list, you will still be
able to configure the settings manually. You can continue by selecting
other from the dropdown.
Step 3: Register content folder(s)
As Front Matter is created to support many (or all) static-site generator, you will need to specify where your Markdown/content lives.
From the moment you register a folder, it will be used on the dashboard to show an overview of all files.
Registering a folder can be done from the list of folders Front Matter has found that already contains supported files.
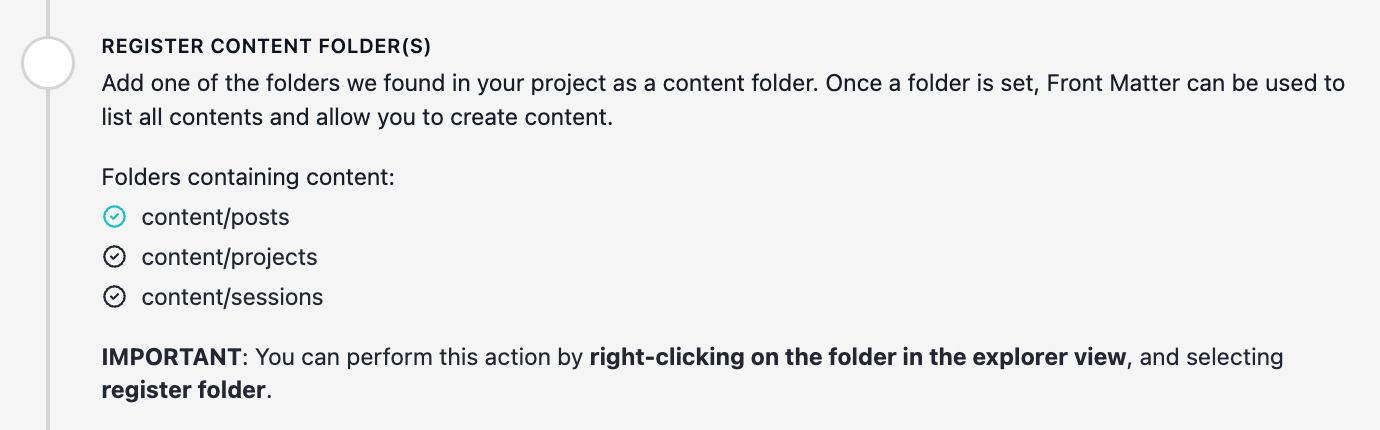
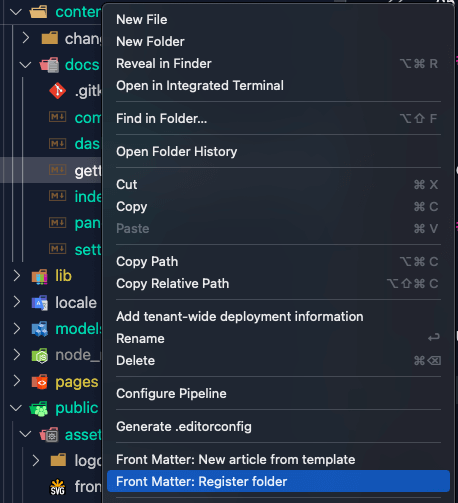
If one of your folders is not shown, you can register it by right-clicking on a folder name in the explorer panel from Visual Studio Code and selecting Front Matter: Register folder.
Info: By default, the extension will include content from the current folder and its sub-folders. If you wish to exclude the sub-folders, you can do this by updating the frontMatter.content.pageFolders configuration setting and specifying the
excludeSubDirproperty with the value astrue.
Since version 8.3.0 you can use placeholders in the folder
path. This functionality allows you to generate dynamic content paths based for example on the
current date.
Workspaces with multiple folders
If you are using workspaces with multiple folders in Visual Studio Code. Front Matter will try to
figure out for which folder it needs to be activated. It does this by searching for the
frontmatter.json file in the workspace folders.
When Front Matter cannot find a frontmatter.json file in any of your folders (means that it is not
initiated yet), it will ask you to pick the folder.

Once you selected the folder, it will create the frontmatter.json file and reload the workspace.
Backers & supporters
If you are one of the Front Matter supporters/backers, you can hide the support links from the UI. We know it is not much, but we want to give something small back, and what is better than a bit of space? 🤓
By default, you'll see the following support links:

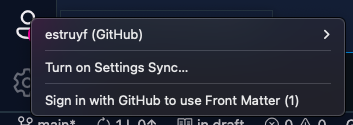
When you log in via GitHub, you'll see the following:

Simply start by clicking on the Accounts button, and select Sign in with GitHub to use Front
Matter or launch the same flow by using the Front Matter: Authenticate command.
Follow the proposed steps from Visual Studio Code.
Enjoy using Front Matter
Feedback/comments
Did you spot an issue in our documentation, or want to contribute? Edit this page on Github!